How to Repair concrete spalling, aka concrete cancer?
This broad question has no direct answer as various items should be assessed beforehand before deciding on the best repair method.
1. Overview
Concrete requires your attention in many different ways. Concrete cracks and breaks from day 1 if not protected from various damages. It also deteriorates over time if not optimised and protected against chemicals, moisture infiltration, and biogenic sulfuric acids. Some concrete issues that require repair are structural cracking (Shear, flexural, torsion, tension, compression, etc), drying shrinkage cracking, plastic shrinkage cracking, chemically induced cracking both internally and externally, thermal cracking, corner or edge chipping, spalling and deterioration due to reinforcement corrosion, freeze and thaw cracking, fire spalling, etc.
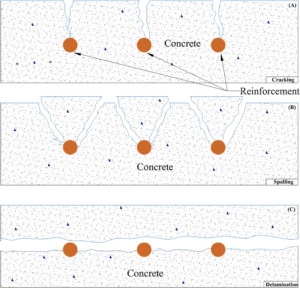
In this article, we will discuss the proper repair method for Concrete Cancer, known to cause cracking, bulging, delamination, spalling, and structural failure if not repaired at first signs. This is caused by contamination of harmful substances such as chlorides, Sulphates, and carbon dioxide triggering corrosion of steel reinforcement, hence spalling.
Alongside our 20 years of expertise in concrete durability and repair across infrastructure, residential, and commercial projects, we have also consulted technical documents from VicRoads, TfNSW, and the relevant Australian Standards.
2. Assessment and Preparation
2.1 Type Identification
How can you tell if you are dealing with Concrete Cancer? Below are the signs:
• Concrete cracks are short and straight lines following the closest bars to the surface undergoing chemical reactions.
• The cracks are bulging with the possibility of noticing parallel cracks due to concrete failure in tension.
• Brownish colour oozing from the cracks (Rust stains).
• When you tap
with a hammer, you hear a drummy sound in the affected areas. Read this article The Power of the Hammer.
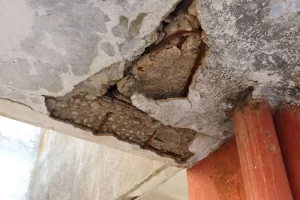
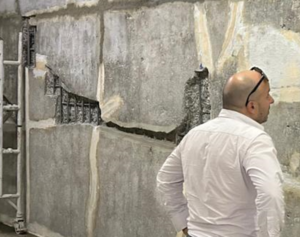
• For advanced deterioration, you could clearly see the corroded bars with no concrete cover.
2.2 Surface Preparation
The surface preparation is as important as the repair itself. Spend enough time to get to sound concrete by following the steps listed in the repair specifications written by a qualified concrete durability consultant. Baleh Consulting Pty Ltd can provide detailed assessment and repair specifications. Chat with us now.
To start the preparation of the patch, follow
the steps below:
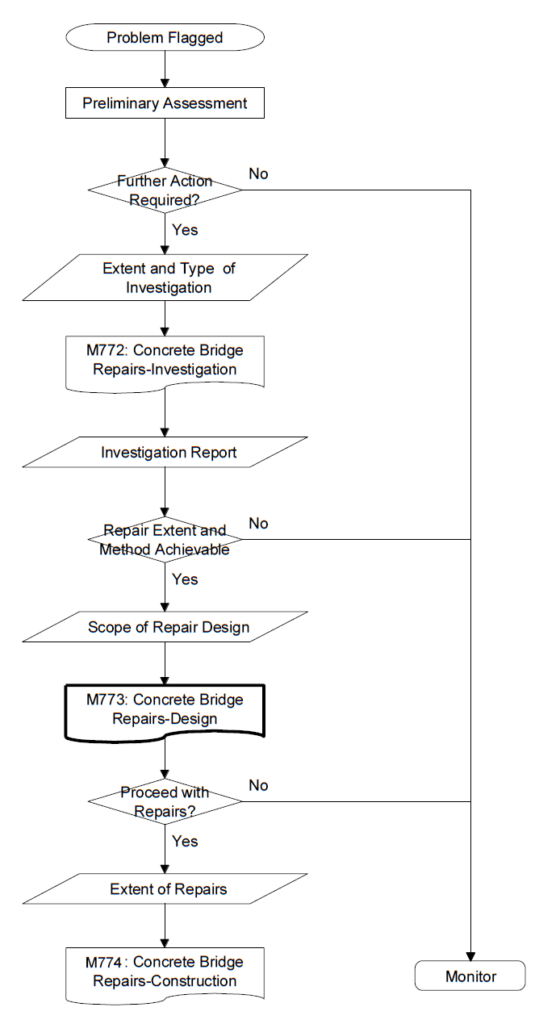
1. Study the steps in the chart below before starting (Concrete Repair process chart from TfNSW QA Specification M773).
2. Wear proper Personal Protective Equipment (PPE) before you start work.
3. Adhere to WHS and environmental requirements at all times.
4. Identify all Hold Points and Witness Points, in advance, wherever and whenever required. Then include them in the Repair Specifications or in separate Inspection and Test Plans (ITPs), which you refer to in the specifications.
5. Ensure proper training, ticketing, and certifications are present.
6. Start by tapping along and around the crack and break all the delaminated concrete until you reach a sound substrate.
7. Using chalk or marker, draw a line 30-50mm away from the dugout patch.
8. Using an angle grinder, cut 15mm deep at 90-degree angle along the line.
9. Use hand-held percussive equipment or high-pressure water jetting to remove the affected con
crete within the drawn line and as deep as 20mm behind the reinforcing bars. Repeat the hammer sounding to make sure there are no other weak areas.
10. Using sandblasting and/or a hand-held wire brush, thoroughly clean the flaking bars.
11. Ass
ess the smallest diameter that shows significant corrosion impact. Pitting should be regarded similarly to a total material loss. Identify the types of bars involved, such as tension, compression, shear, stirrups, etc. If the compromised bars are critical, a material loss of only about 5% is permissible. For other types, a loss of up to 25% may be acceptable. It is strongly advised that you seek guidance from a qualified structural engineer rather than making this decision on your own. There may be options to replace or add bars to restore the structural integrity of the damaged concrete element.
12. Thoroughly clean the patch using a high-pressure wash with clean water.
13. Before you start the repairs, assess the concrete at different spots for depth of carbonation and chloride ion penetration by taking core samples and getting them tested by an accredited laboratory. If the concrete member is close to the soil, consider testing for sulphate too.
14. Should the analysed samples reveal significant penetration of carbonation, chloride ions, or sulphate, it is essential to apply cathodic protection or other effective treatment methods to the entire concrete member.
15. Now, it is time to start repairs for the patch. Various systems and products are available for patch repair. We can name a few examples:
a. Zinc-rich coating and cementitious repair mortar. Alternatively, you can use self-levelling, or high-density and low shrinkage concrete mix for large holes to fill.
b. Crystalline system.
c. Epoxy-Resin coating, and cementitious repair mortar.
Baleh Consulting can help you assess, investigate, test, and write the specifications for similar issues on site (Bridges, Tunnels, Marinas, Ports, Airports, Residential, Commercial, Roads, Substations, etc). We will also inspect the Hold Points and write detailed reports.
We trust that you have learned something by reading this article. We encourage you to comment below with your questions if you have any.
3. References:
VicRoads Technical Note TN 72 – Cementitious Repair of Concrete Structures.
TfNSW QA Specifications M774 – Concrete Bridge Repairs – Construction.
TfNSW M772: Concrete Bridge Repairs – Investigation
TfNSW M773: Concrete Bridge Repairs – Design
TfNSW M774: Concrete Bridge Repairs – Construction
TfNSW Concrete Bridge Repairs – Guidelines
https://www.researchgate.net/


